Designing a good looking website is definitely one of the most important task of your blogging biz.
Well because….it has a lot of impact on your audience’s behavior. Your website design is the very first thing anyone ever notices.
And if they don’t find it appealing then it would take them less then 2 seconds to click off. We definitely don’t want that.

But this post is not about the whole website design of your WordPress site. It’s about a very tiny detail that may impress your audience with your site design.
That tiny detail is the text selection color of your site. You know when you select some text of any site, you see a background color upon the text selection.
Yeah! That’s what I am talking about.
By default, many website’ text selection color is set to blue or greyish black. But may be you want to change it to make your website look more cooler!
Yes! You can do that very easily in WordPress.
In this post, we’ll be discussing3 methods on how to change text selection color in WordPress very easily.
After following these steps, you can change the default text selection color to whichever color you want!
Like this ↓

Let’s get started!
> Related: 15 Best WordPress themes for bloggers (free and paid)
HOW TO CHANGE TEXT SELECTION COLOR IN WORDPRESS EASILY
We’ll discuss three methods in this post:
Method 1: Using a CSS code in WordPress Customizer (for all themes)
Method 2: Using the WordPress customizer (not for block themes)
Method 3: Using a code and a plugin (for all themes)
Without further ado, let’s discuss these steps one-by-one!
METHOD 1: USING A CSS CODE IN WORDPRESS CUSTOMIZER
This method is suitable for all themes. Although the second method is the easiest to do among all three methods, that method would not be applicable to all the themes.
Go to your dashboard, then go to Appearance < Customize and you’ll see the WordPress customizer interface.
Scroll a bit and click on the Custom CSS tab ↓
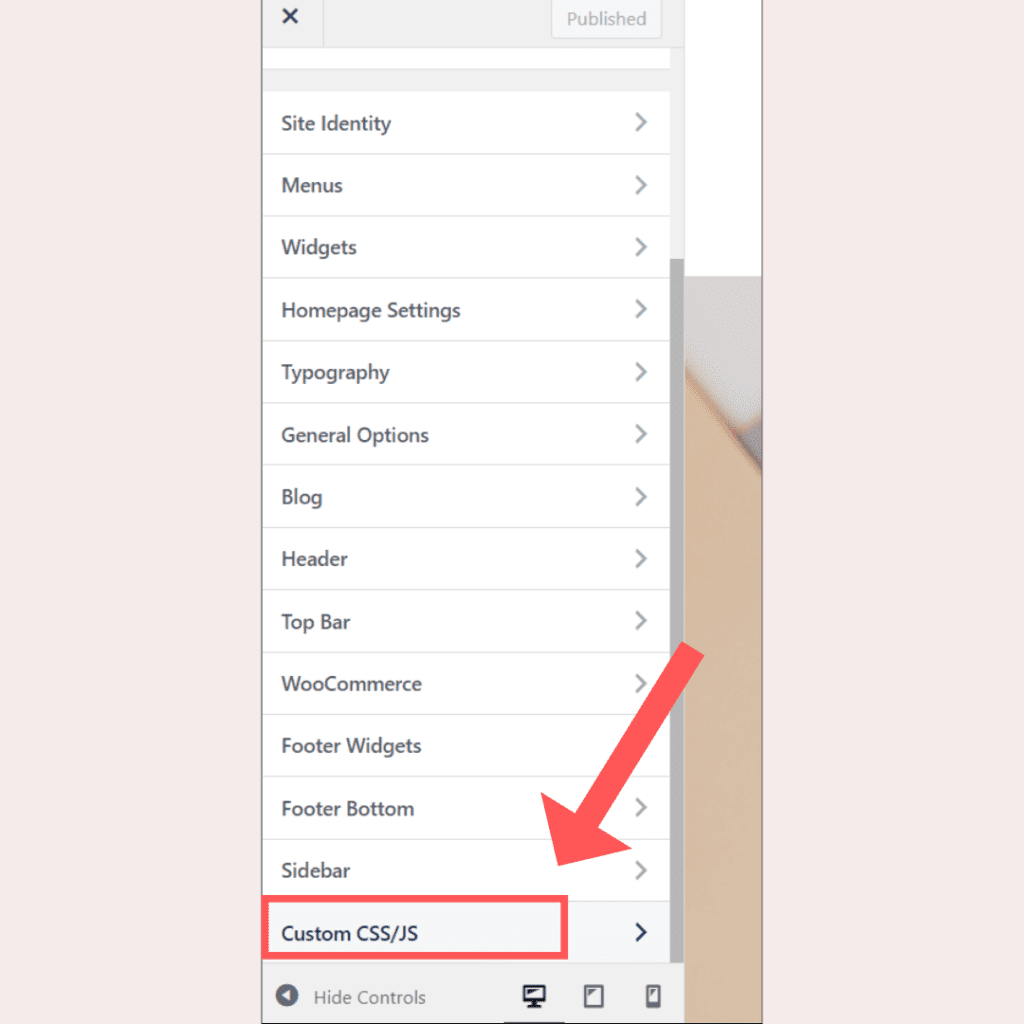
Copy and paste the following CSS code in there ↓
::-moz-selection { background-color:#000000; } ::selection { background-color:#000000; }Don’t forget to change the hex code from #000000 to your desired hex code!
Then click publish and you are done!
METHOD 2: USING THE WORDPRESS CUSTOMIZER
This method doesn’t work on block themes. If you are using a block theme for your site then you have to use the 1st or 2nd method.
In order to change the text selection color, go to your Dashboard < appearance < Customise.
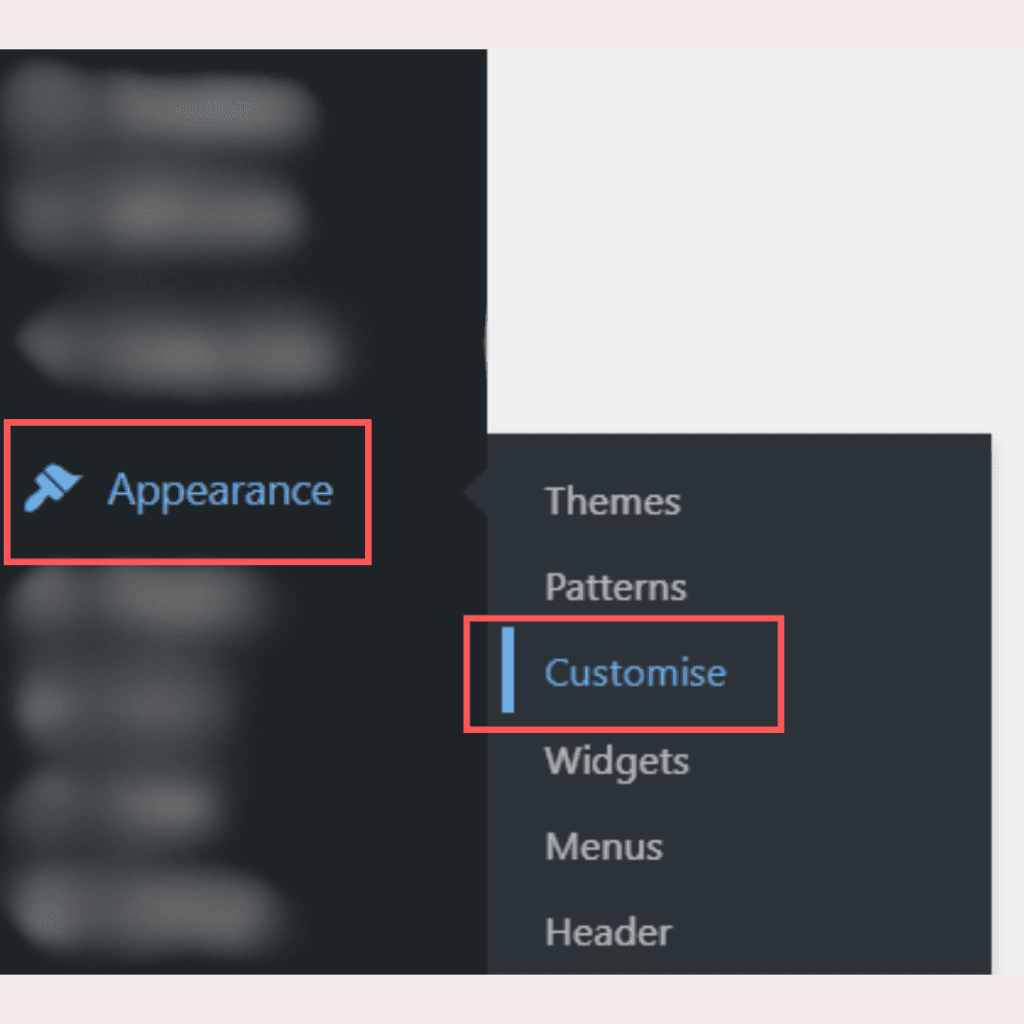
Upon clicking on Customise, you’ll be directed to the WordPress customizer where you have to choose the ‘color’, ‘global’ or ‘global settings’ option.
The options may vary from theme to theme. Just choose a similar option which looks like the mentioned options.
For reference, in the Astra theme, you will find a ‘global’ option in the customiser.
Go to Global < colors < accent color and them choose whichever color you want for the text selection of your website.
Click on Publish after choosing the desired color and reload your website.
And voila! You’re done!
Let’s now discuss the third and the last method ↓
METHOD 3: USING A PLUGIN
For the third and the last method, you’ll need a plugin called WPcode. It’s a free WordPress plugin to add custom codes to your website.
And no, you don’t have to be a tech-savvy person to use this method. Just follow along!
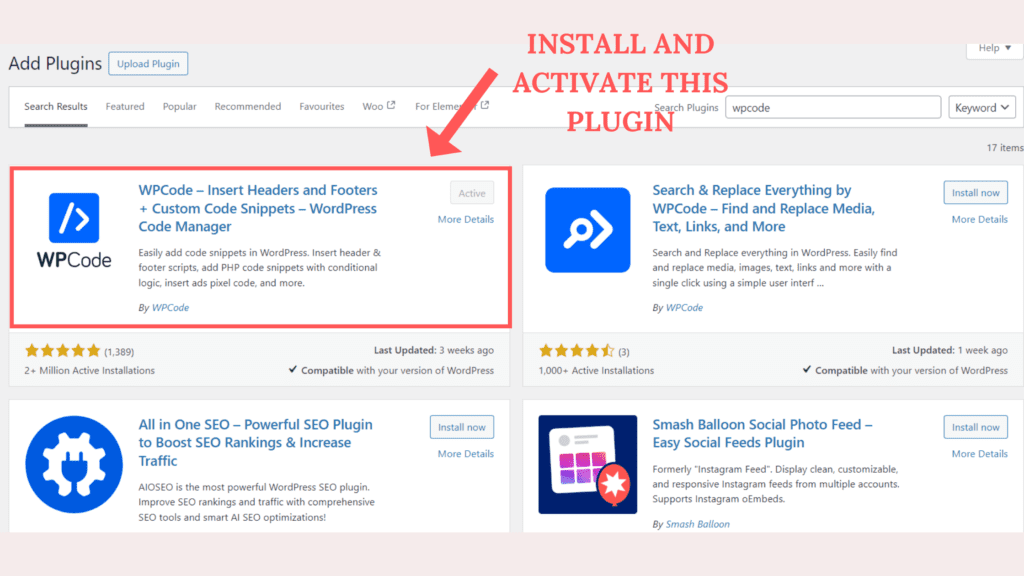
Go to your dashboard < plugins < add new plugin. Search for WPcode plugin, install and then activate the plugin.
Upon activation, go to the WPCode plugin tab and click on ‘add new snippet’. You have to add a custom snippet of your own. Just click this option as shown in this image below ↓
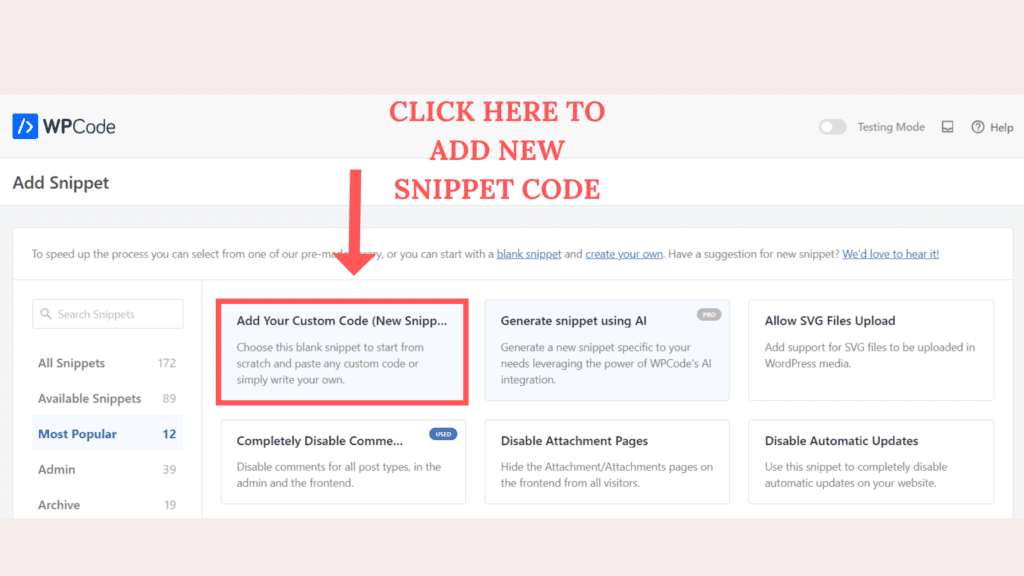
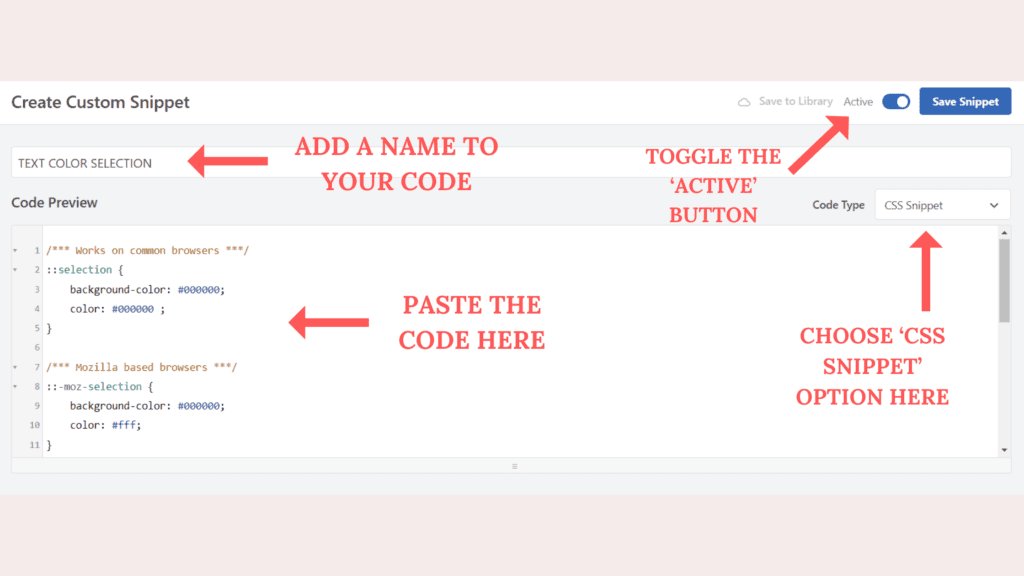
Copy and paste this code in the newly created snippet ↓
/*** Works on common browsers ***/
::selection {
	background-color: #000000;
	color: #000000 ;
}

/*** Mozilla based browsers ***/
::-moz-selection {
	background-color: #000000;
	color: #fff;
}

/***For Other Browsers ***/
::-o-selection {
	background-color: #000000;
	color: #fff;
}

::-ms-selection {
	background-color: #000000;
	color: #fff;
}

/*** For Webkit ***/
::-webkit-selection {
	background-color: #000000;
	color: #fff;
}
Don’t forget to change the background color hex code from #000000 to your desired hex code. You can copy your desired hex code from coolors and paste it here.
Also, Make sure to choose the code type as ‘CSS Snippet’ and toggle the active button and then save the snippet.
Refer to this image ↓
After saving the code snippet, reload your website and there you go! You are done!
And it hardly takes 5 minutes to do this. Pretty amazing, right?
> Related: How to use WordPress for the first time
DID YOU FIND THIS USEFUL?
If you find this useful then comment below. I am excited to hear your thoughts on this and if you are facing any issues then let me know!
Pin this post for later!
