Are you someone who owns an online store on your website or marketplace to sell digital products like templates, themes and other types of products?
If the answer is yes, then you found the right post.
Today, I have crafted this detailed post on how to create product images in Canva that look professional and stand out. This will help you boost your sales and increase your earning potential.
In the last post, we discussed how you can use the hidden features in Canva to create awesome graphics!
So, here’s another thing that you can do with Canva and it’s super simple. Nothing too complex.
I have included everything in this post, all the examples and detailed processes to create beautiful product images.
Are you in? Let’s start then!
Some links in this post are affiliate links. If you purchase through these links, I earn a commission at no extra cost to you. I only recommend products, tools and services that I trust. For more information, read the full disclosure here.
What are product Images?
Okay so if you’re not aware, I run a Canva template shop on this website and in order to make people buy my templates, I have to showcase those templates beautifully to increase the probability of people buying my templates.
That showcase is done by creating product images.
You have to give your audience an idea of what your digital product looks like so that they can go ahead and make the decision whether to buy it or not.
Let me give you an example.
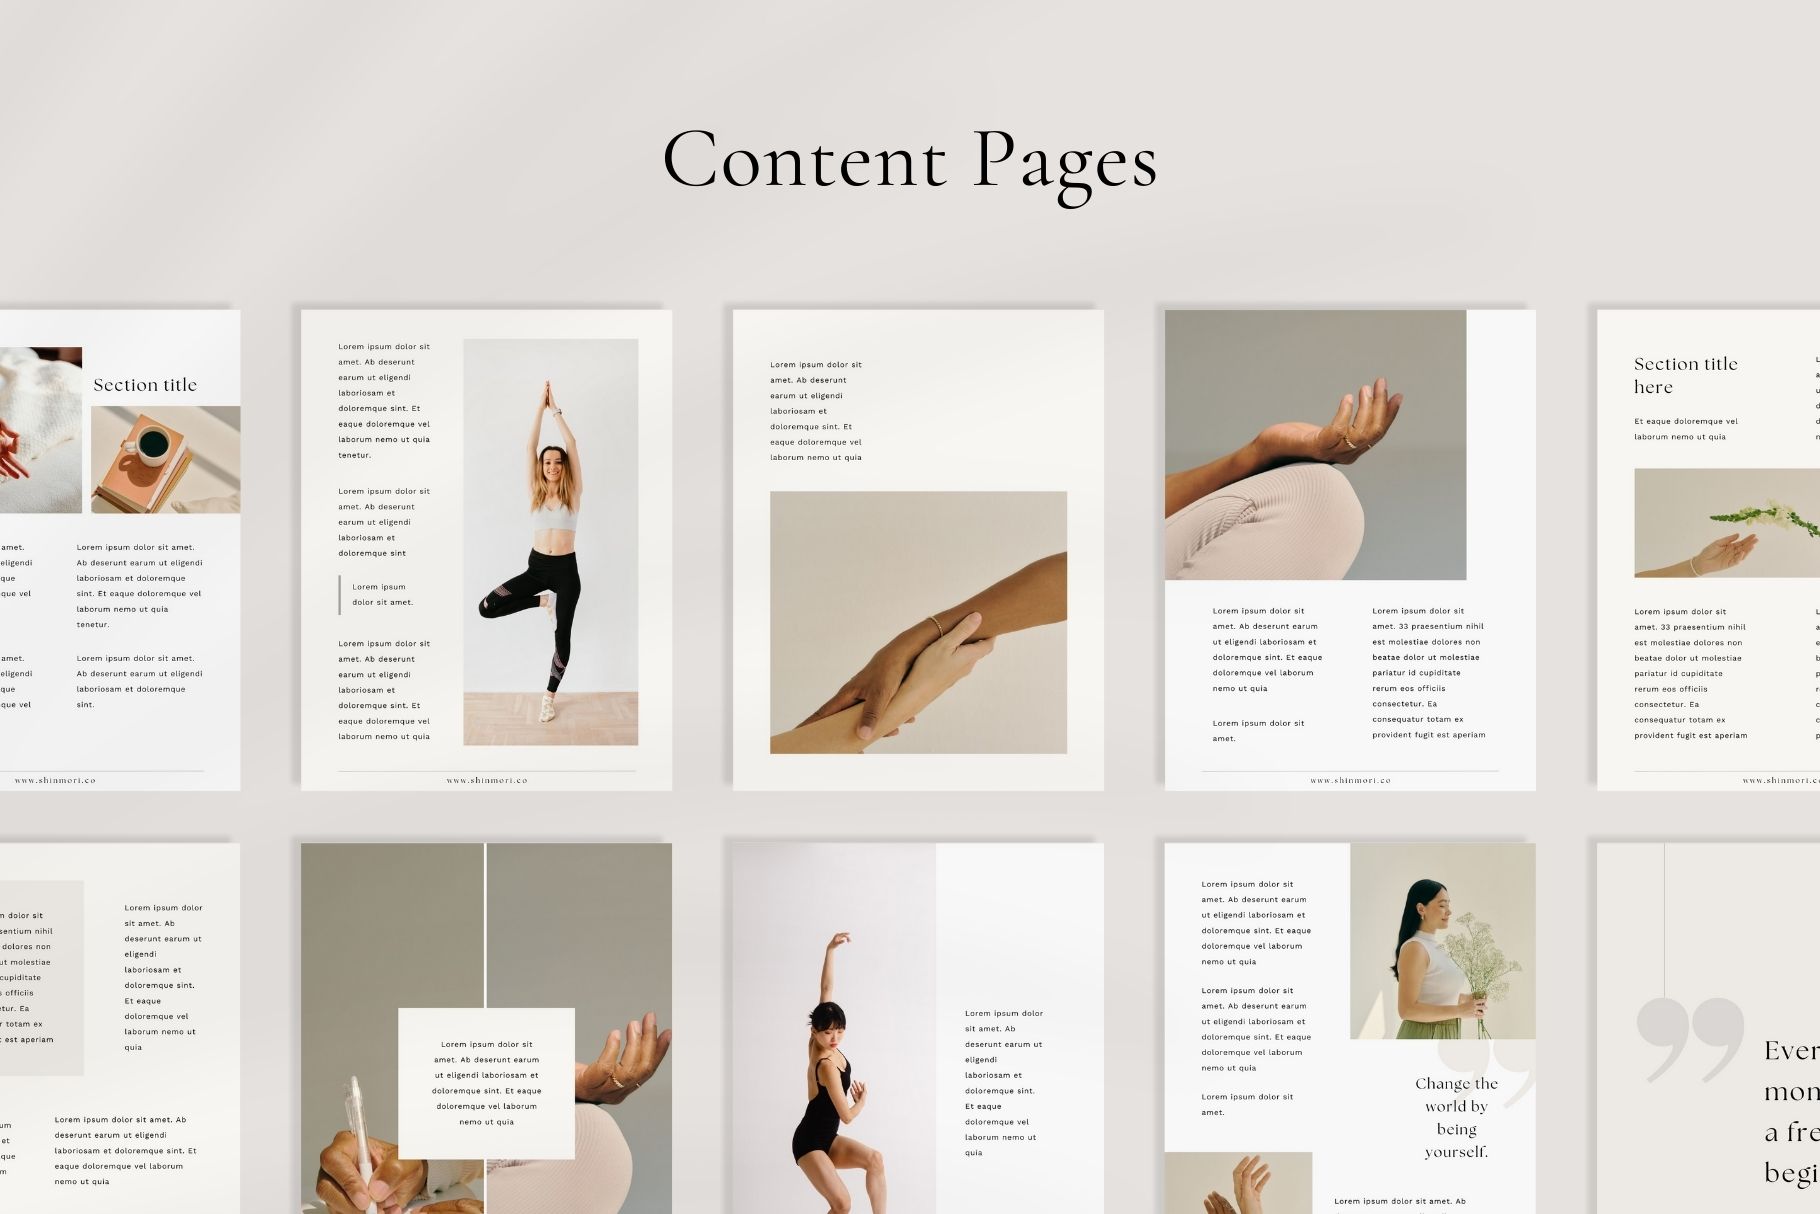
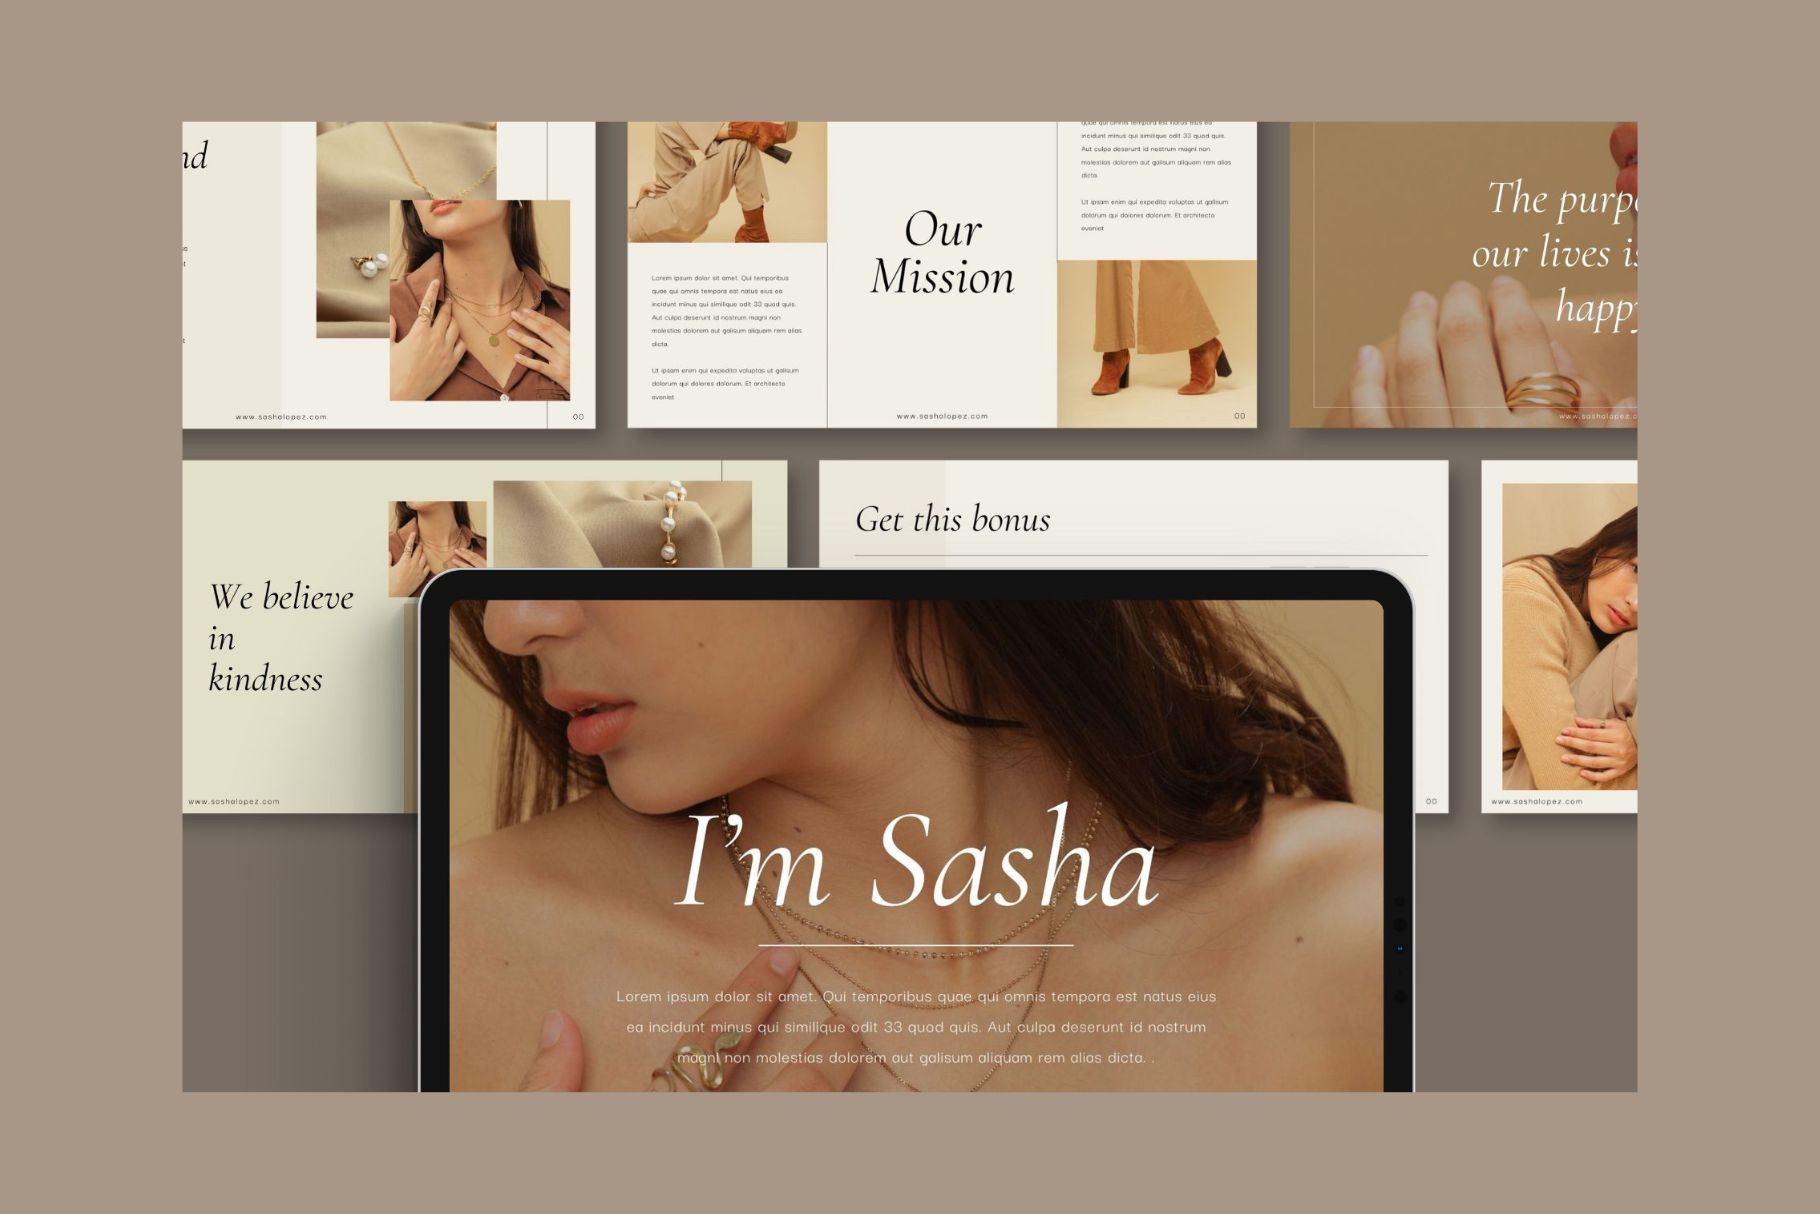
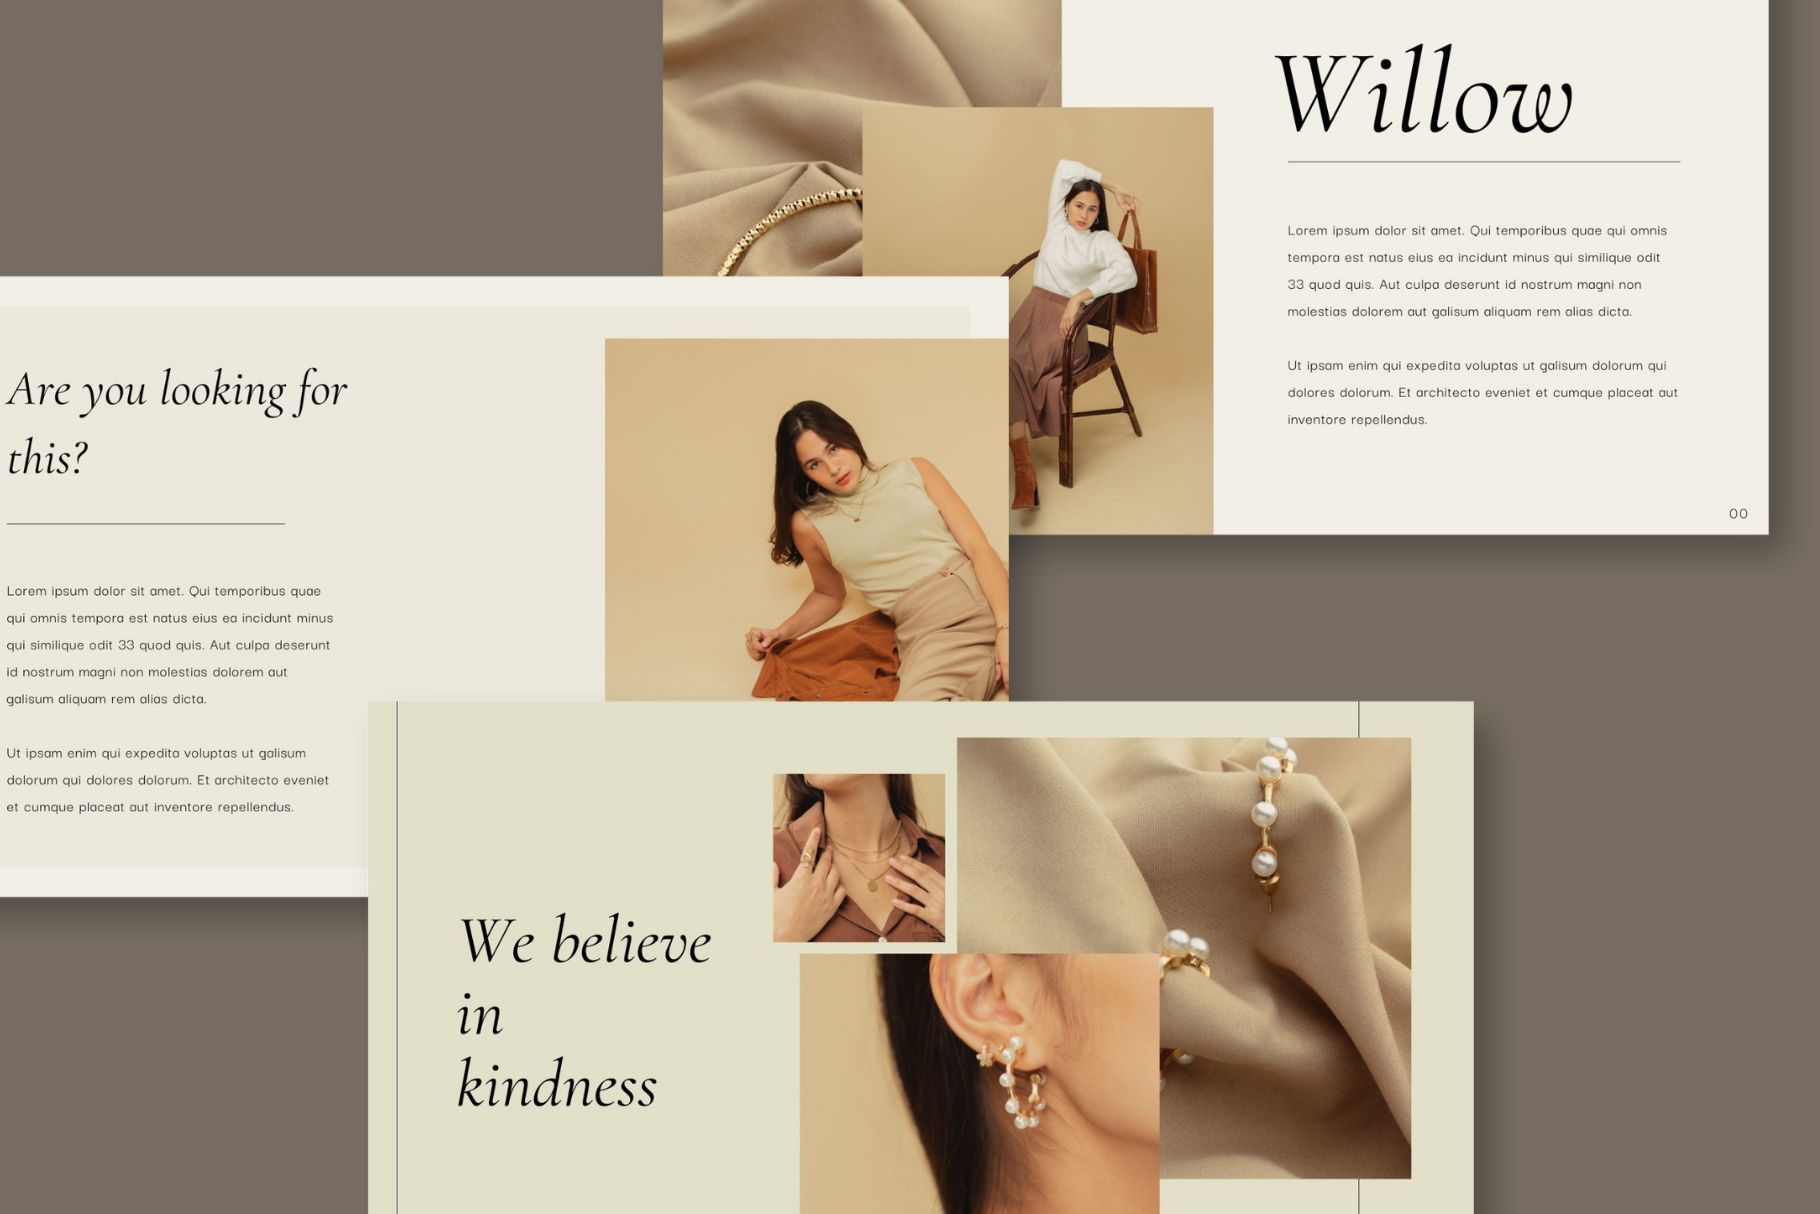
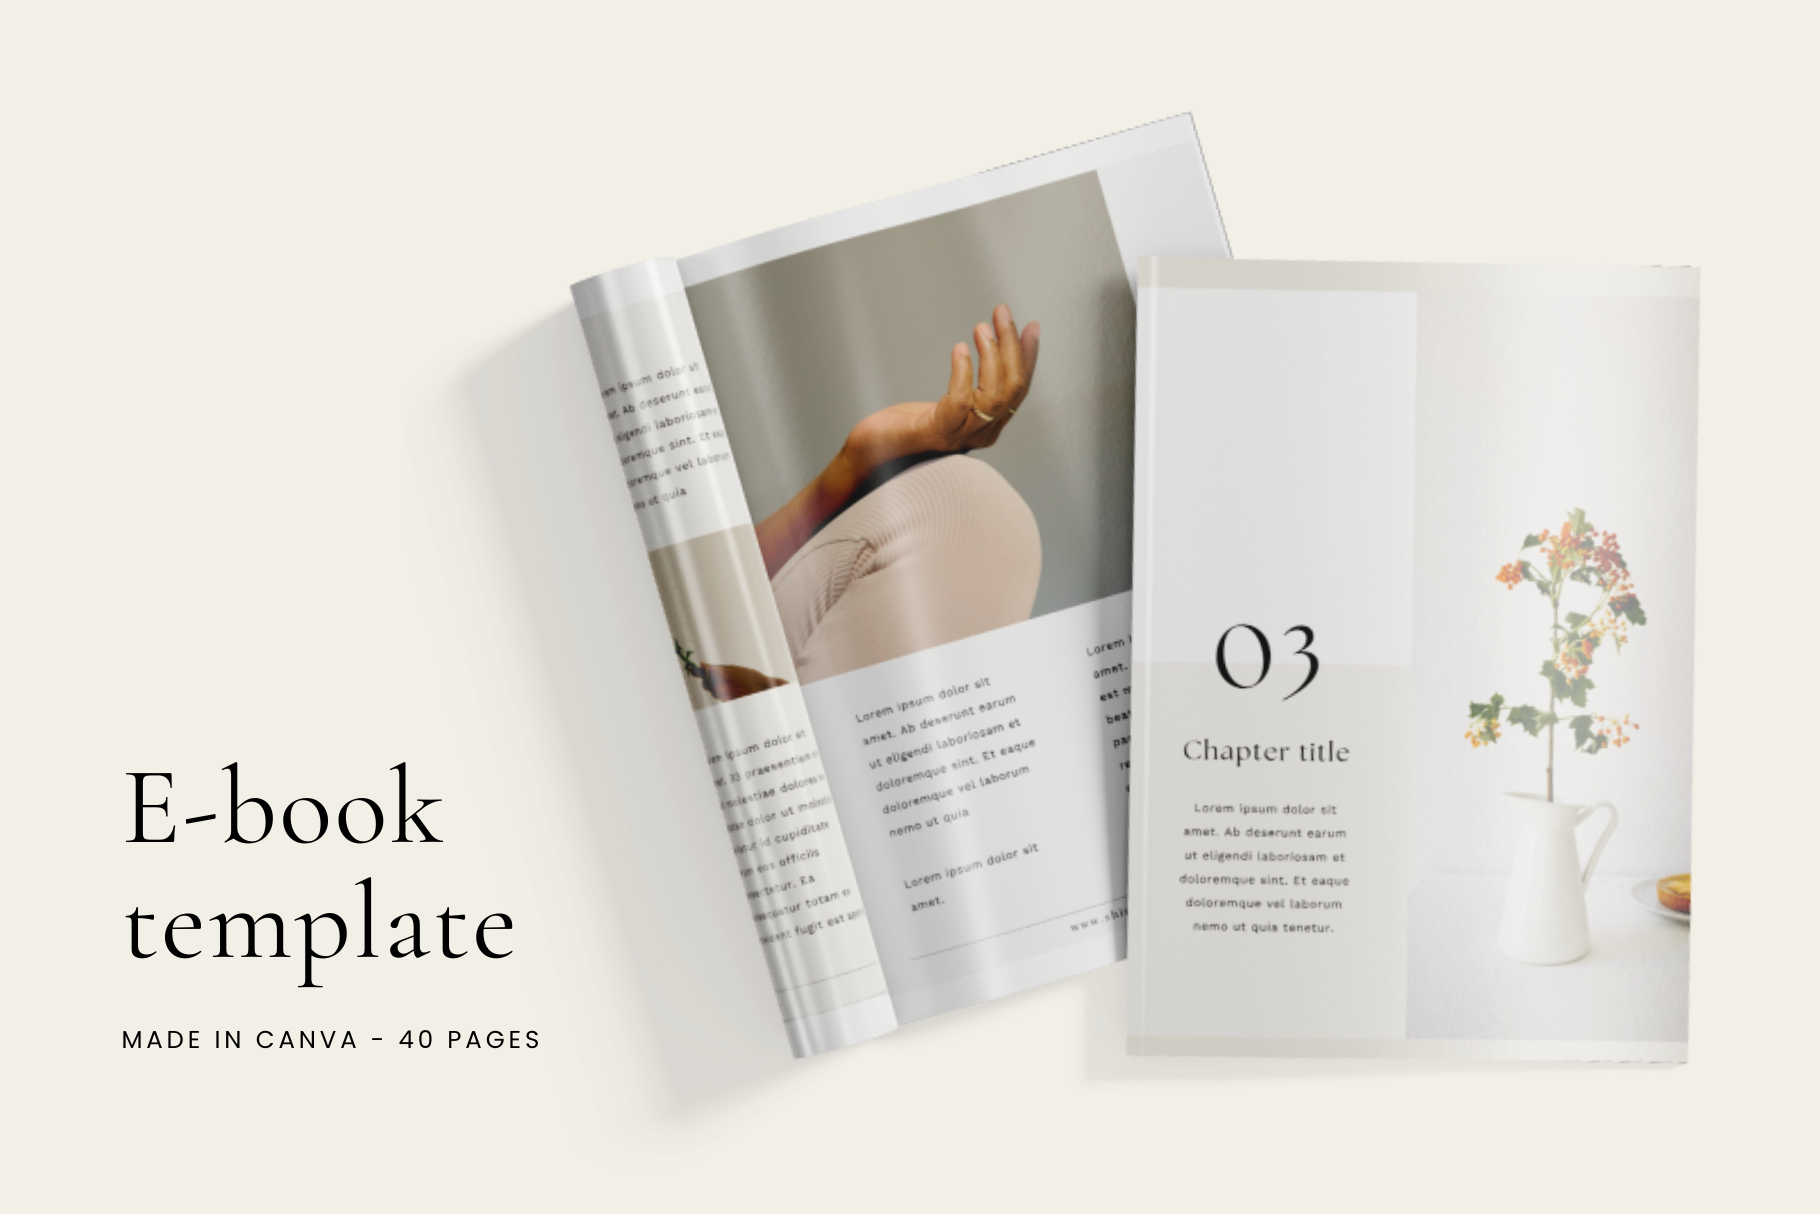
This is a product image of an e-book template from my shop. You can see that I have kept it minimalistic, realistic and professional to attract my potential customers to it.
Looks pretty, right?
Don’t worry. I’ll show you how I’ve created this product image in a few minutes.
Moving on. Let’s discuss some of the requirements for creating product images for your digital products.
Grab Free Canva Templates
Get a sneak peek of some premium, unique, amazeballs Canva templates for 100% free! This free Template bundle has social media and media kit templates. Enter your Email to download!
Tools you’ll need to create Product Images
There’s not a whole lot of tools you need to create product images, only a couple of them. It also depends on how many tools you WANT to use.
This blog post is mainly focused on Canva but many people who sell products like templates and themes (including me) use advanced editing tools like Photoshop or Indesign.
As I said, it depends on you and your budget.
But let’s talk about the main requirements. To create product images, you’ll need these tools along with Canva:
Let’s discuss these platforms/tools one by one.
Canva
The main tool you’ll need to create those beautiful product images is, of course, Canva. A free version of Canva will also work and you can also invest in a paid version if you have the budget.
Most of the editing part will take place inside Canva and here I’ll share the step-by-step process for editing in Canva.
The best part about Canva is that it’s so easy to use even if you have never touched an editing tool before, you’ll have no problem creating the most beautiful product images.
Just follow my steps!
Unsplash/Pexels
Canva has a huge stock photo library but if you’re looking for more platforms then I recommend these two – Unsplash and Pexels.
Personally, I love the quality and variety of Unsplash more but you can check out both platforms for some amazing stock photos.
And yes, you can definitely use stock photos for your product images!
Freepik (optional)
I love Freepik because of its huge library of stock images, mockups, and templates. On a free plan, you have a 10-download limit per day, but that’s enough for what we need to do.
And you can always upgrade to a pro plan if necessary.
I’ll also recommend some Freepik mockups that you can use to create product images so keep reading.
Types of Product Images you should create
It’s always better to plan stuff out before you start creating your product images. Just winging it is not a very great idea.
Yes! There’s a lot more to selling stuff online than just designing or creating the actual product but I’ll make this process a little bit easier for you.
Let us discuss some types of product images that you should create. The very first type is:
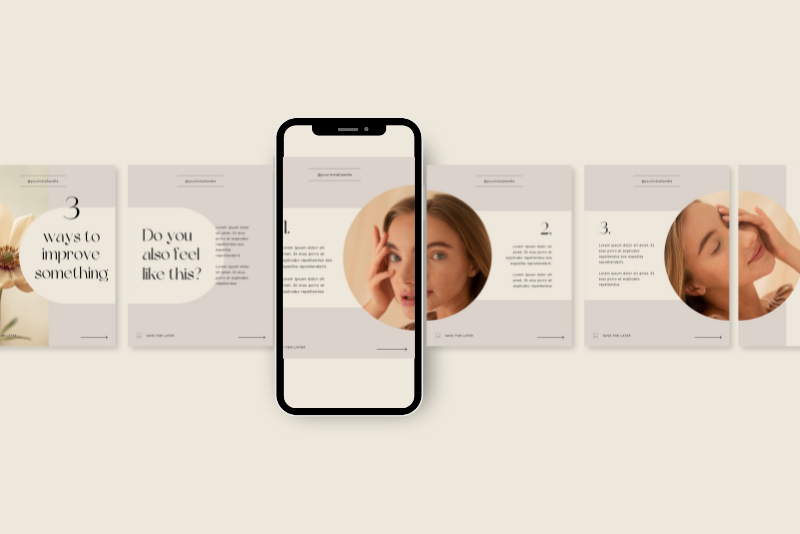
The Hero Image
The hero image is the first image people will see on your sales page, Etsy listing, or website. You have to put extra thought and effort into it.
Your hero image is very important. It must be something scroll-stopping. Something that makes people say “Hold up, lemme check this beautiful thing out”.
If your hero image is ~meh~ then the chances of making sales will also be ~meh~. So, put extra effort into those.
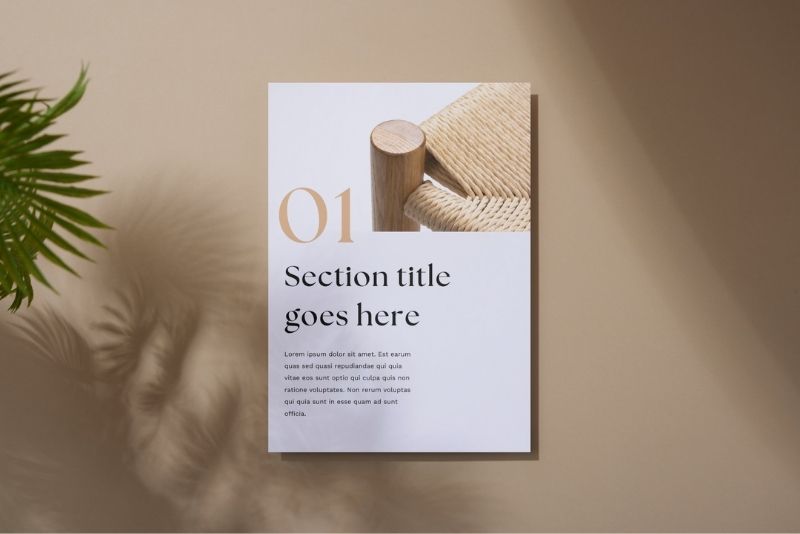
Take this as an example:
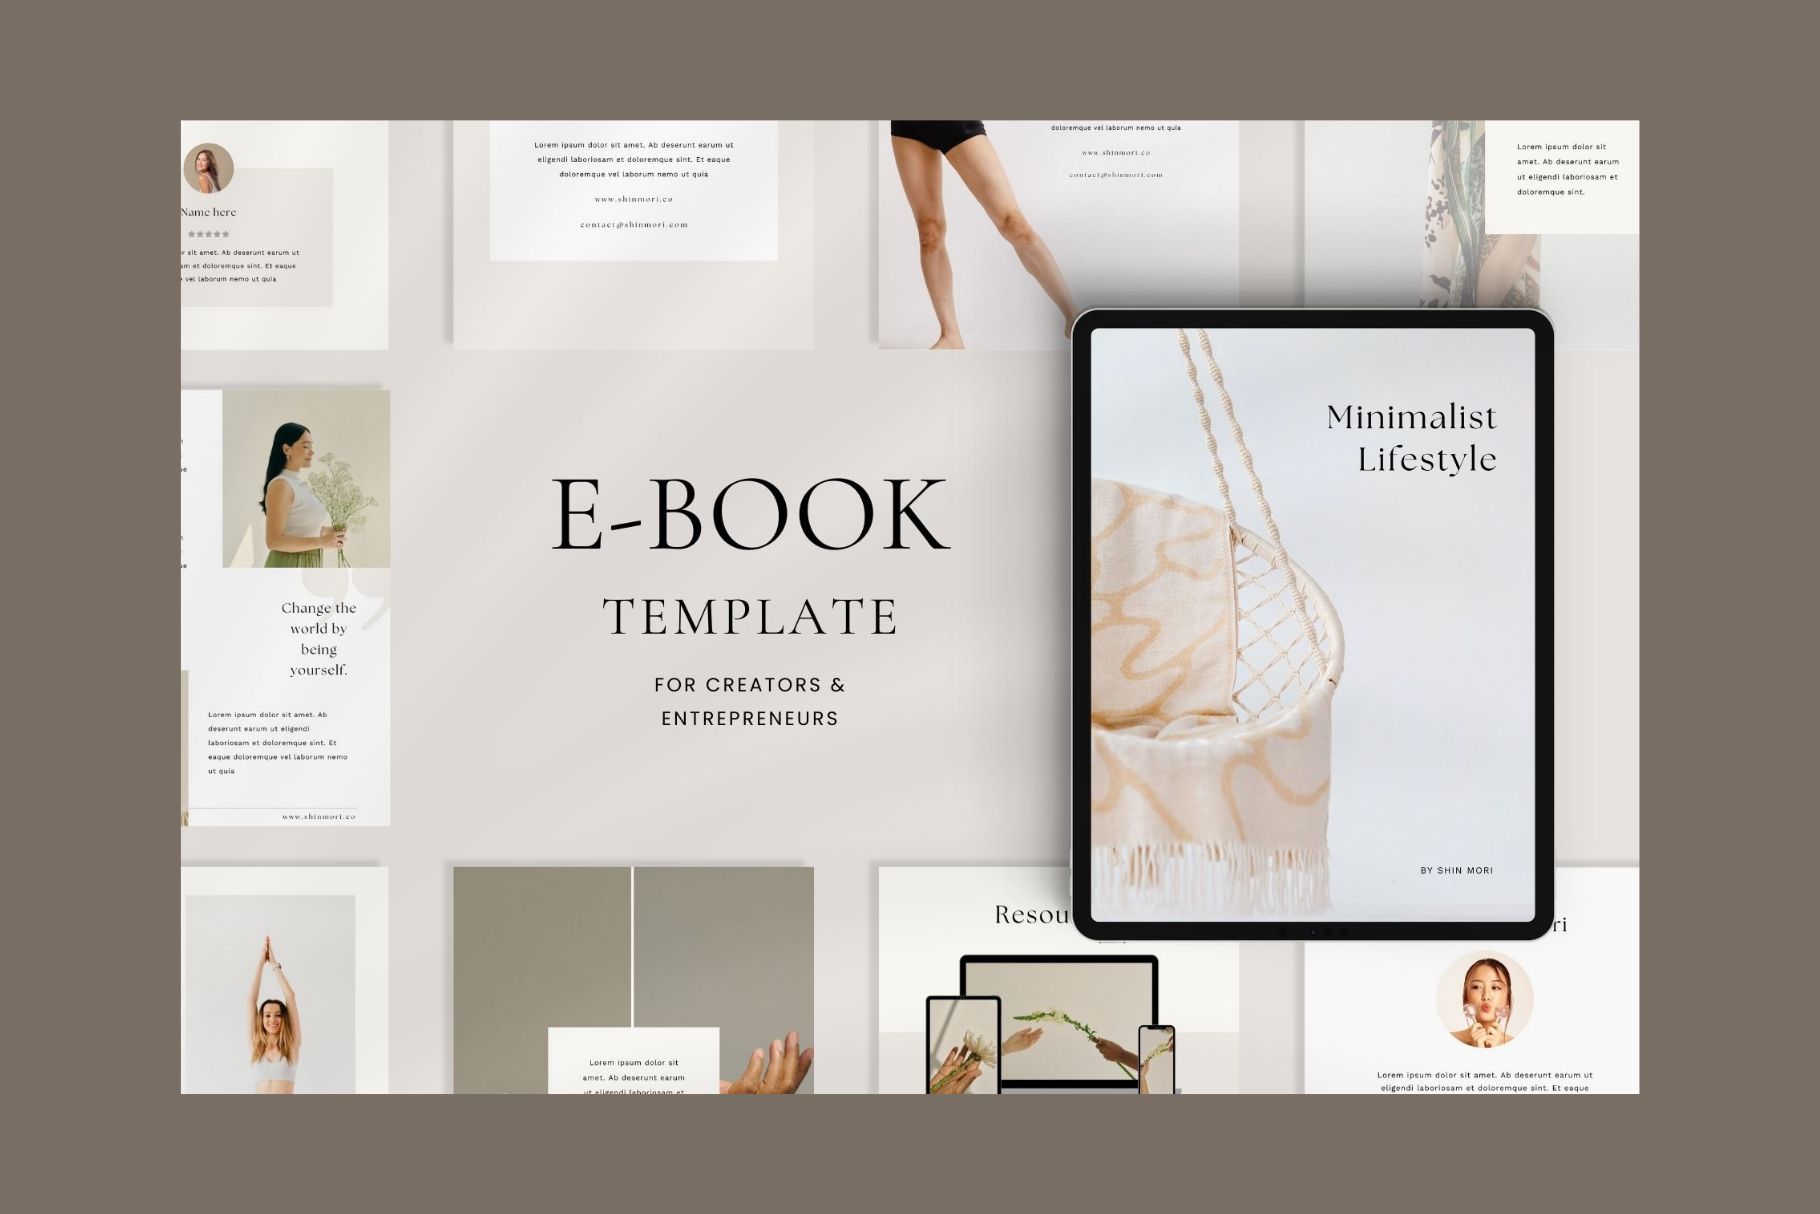
Look how pretty this hero image looks. It gives a preview of the product, explains the content and is overall very appealing to the customers.
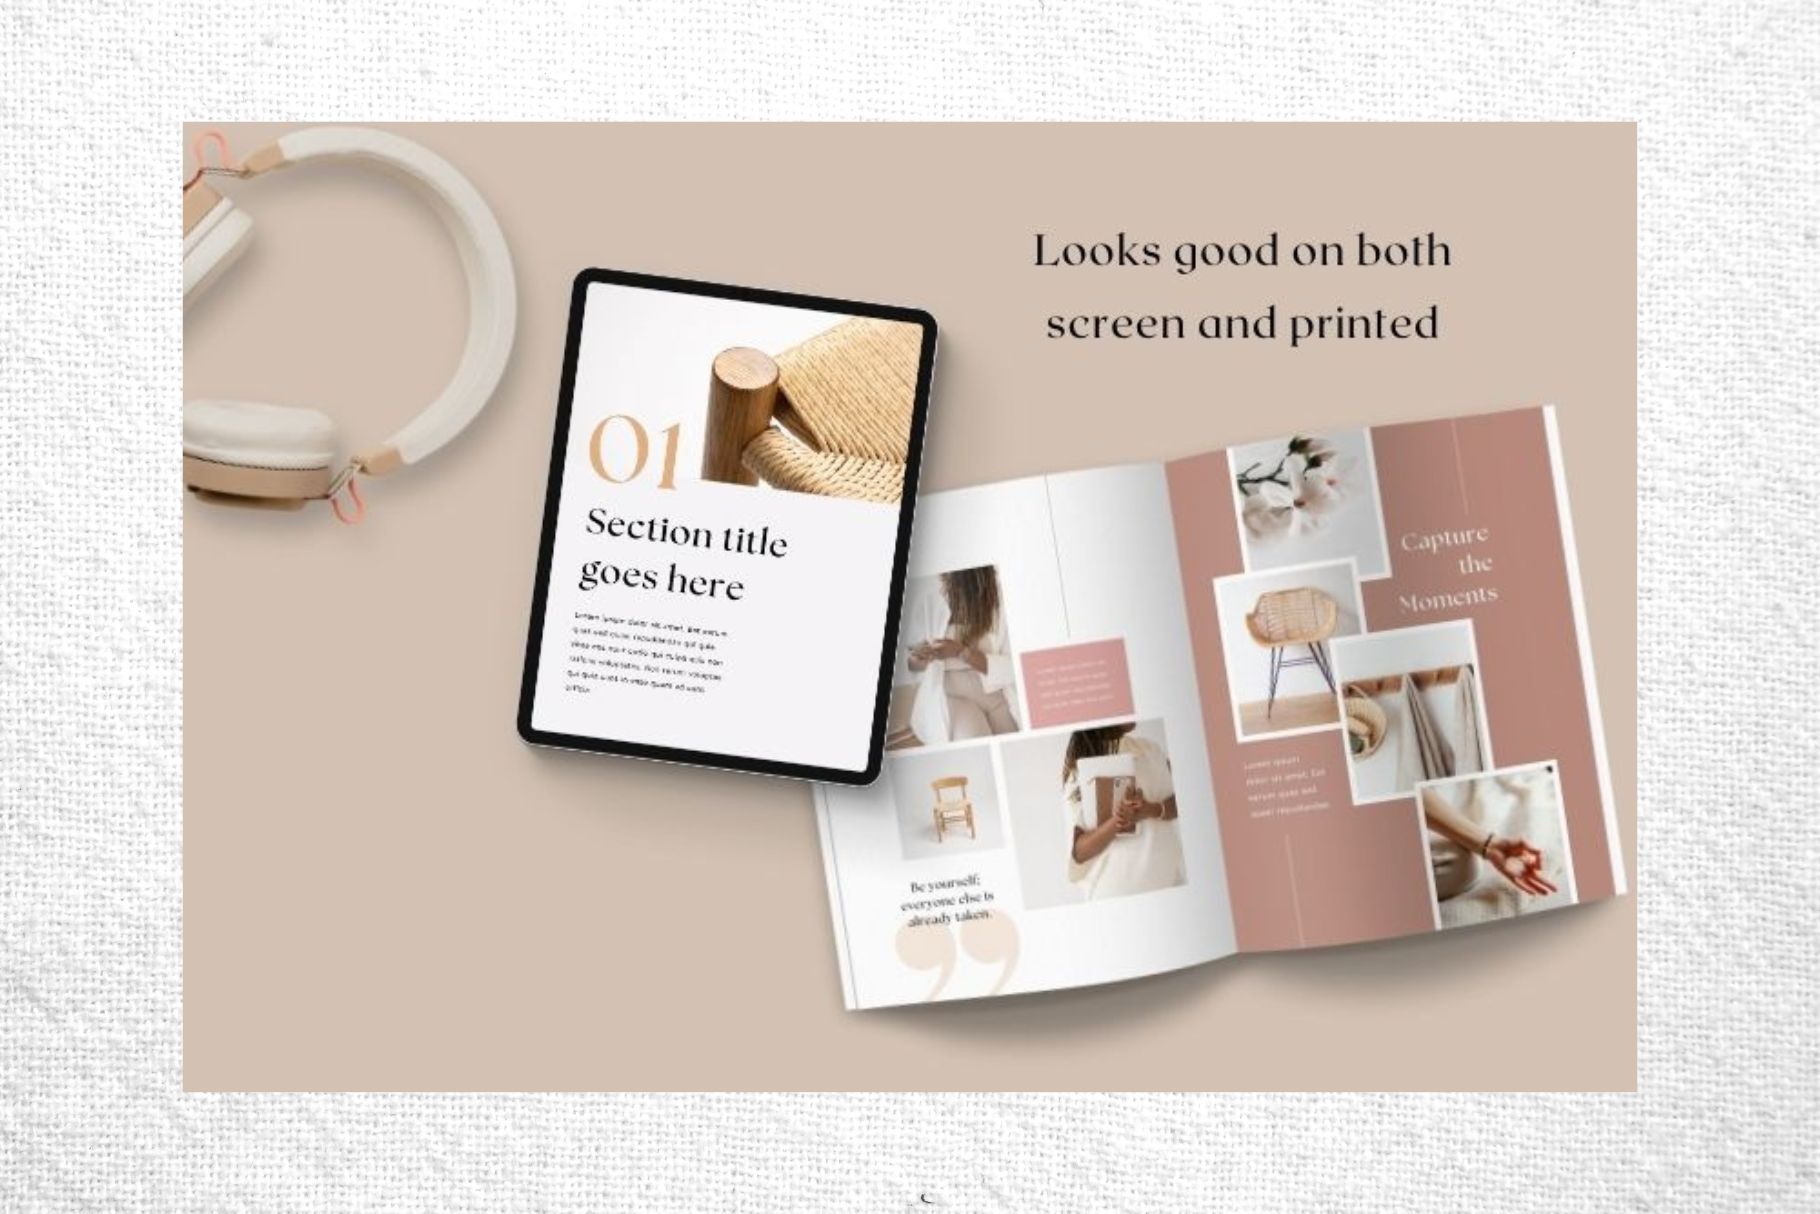
Mockups
Mockups are a visual way to showcase your product to potential customers. It can be a desktop mockup, tablet mockup, phone mockup, magazine mockup, paper or any digital or printable form.
To put it in simple words, mockup images give an idea of how your product will look on different devices or printable versions.
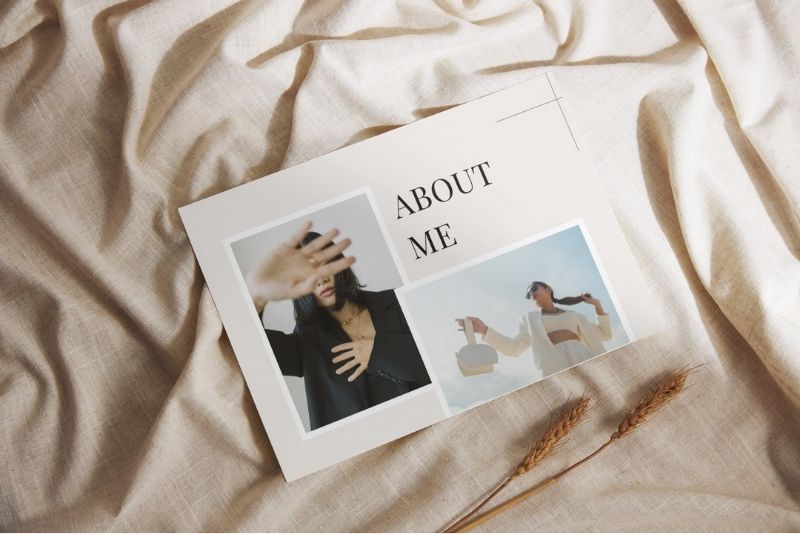
Look at this mockup image:
You can create these very easily using Canva using frames and shadows. I’ll explain in detail later!
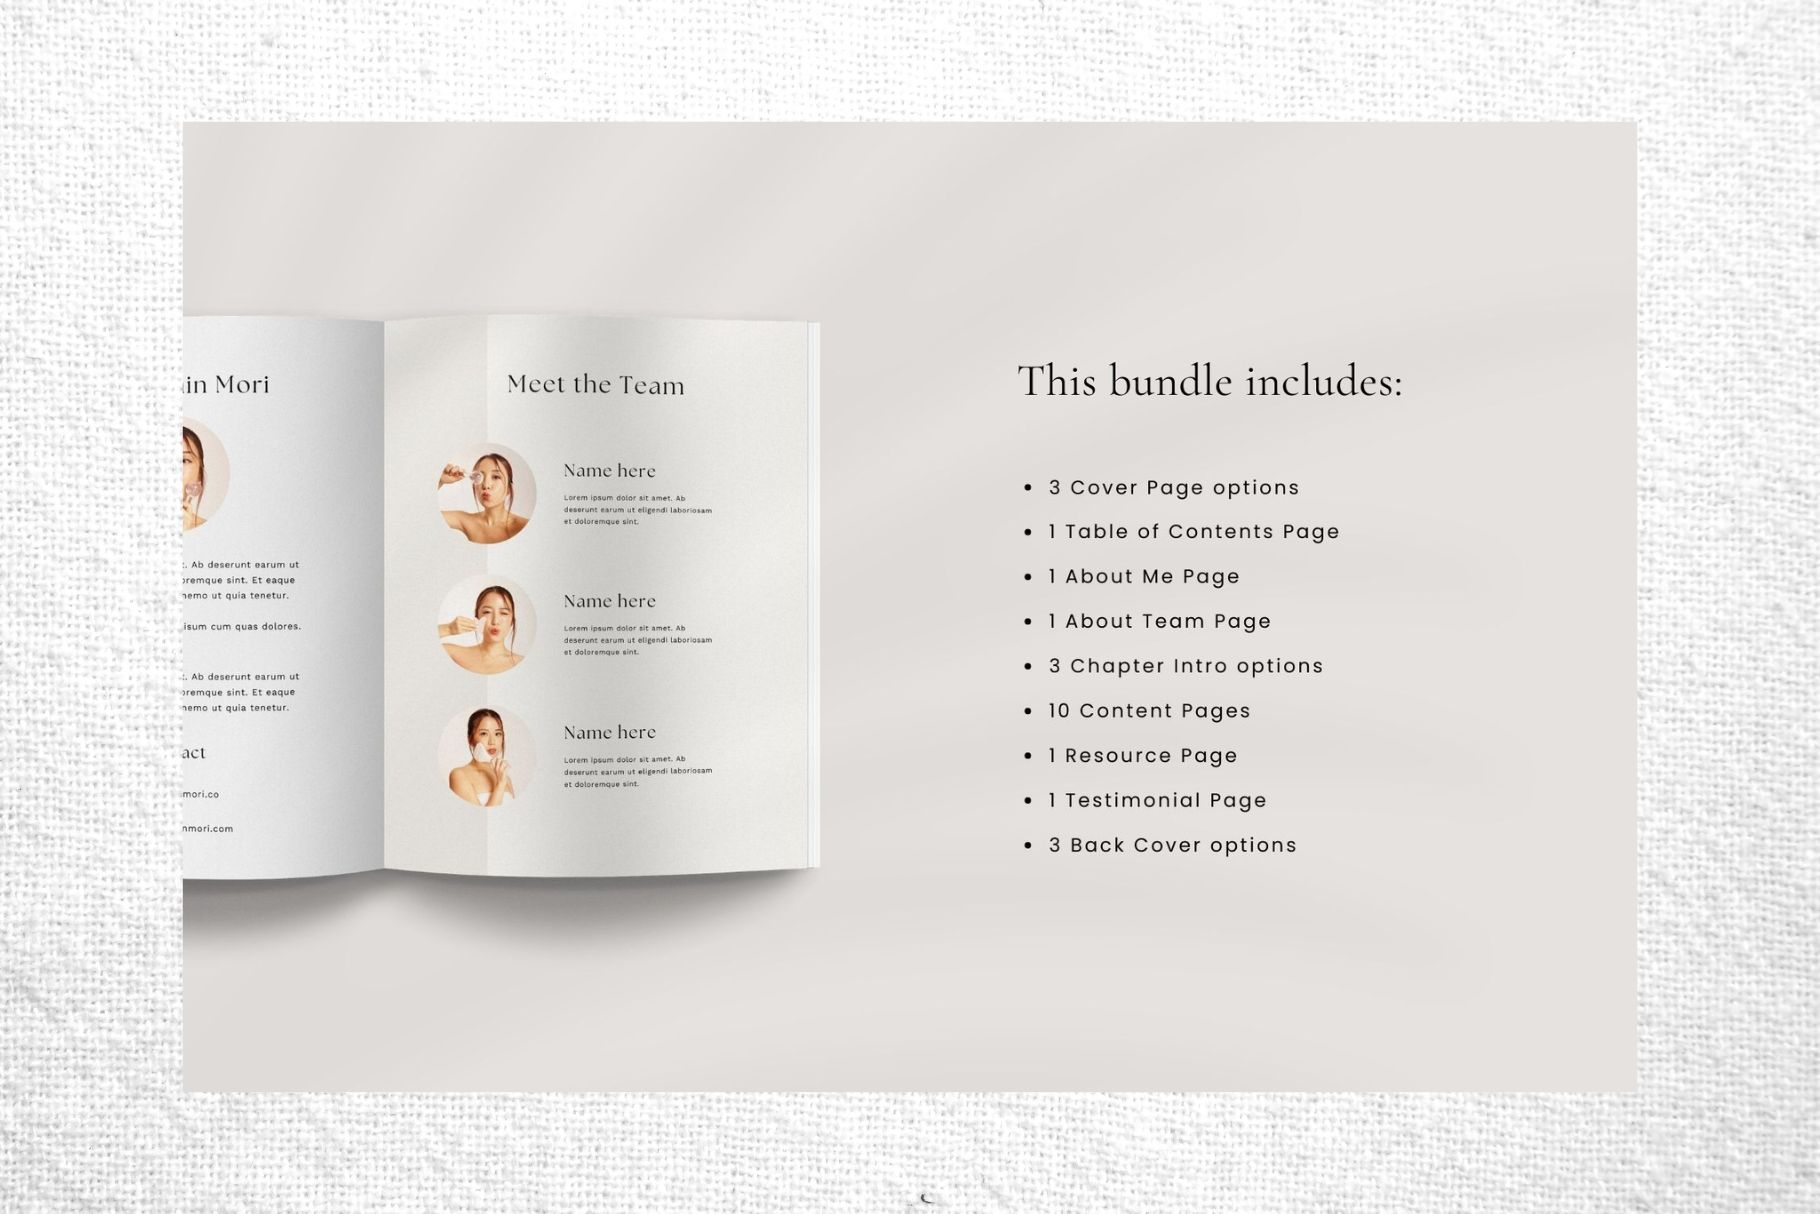
Product details
The third type is those product images that provide details about the product. It can be the size of the product, the number, and what’s inside if you’re selling a bundle.
It depends on the digital product you’re selling. Here’s an example:
Lifestyle Images
You can incorporate your product into a scene such as workspace, tables, chairs or anything you want.
I personally like the flat-lay type of lifestyle images that look something like this:
As you can see, it gives a realistic idea of your product to the viewers which is a plus factor.
Now that we have discussed the basics of product images, let’s move on to the main section of this post which is how to create product images. Let’s discuss!!
How to create Product Images in Canva: step-by-step guide
There are many different ways to create product images in Canva so let’s discuss them one by one.
You may need to use other tools too but the main editing process will take place inside Canva.
For the image size, using a landscape canvas is better because it offers a lot of space to work with. Most marketplaces like Creative Market and Creative Fabrica recommend using landscape product images.
I use the size of 1820 x 1214 pixels. It’s the perfect size to work with and create some awesome images. Let’s catch up to the main process!
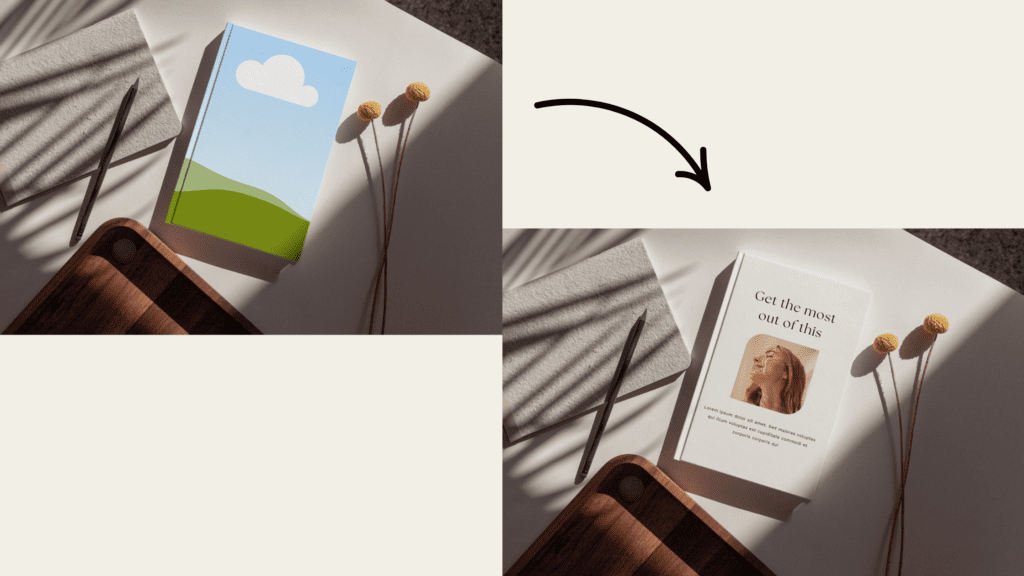
Method 1: Shadows and frames
Let’s learn how to create product images in Canva using shadows and frames. Here is an example:
The above product image is created in Canva from complete scratch. I used a phone frame and used the shadow effect on my templates.
Step-by-step tutorial:
- Change the background to a desirable color
- Go to elements and search ‘phone frame’. Drag and drop it on the Canvas.
- Drag and drop your template/product on the phone frame. In this case, I had to align the carousel so I changed the frame color to the same as the background color and put the template on the phone so it looks like a phone mockup.
- Go to elements and search for ‘box shadow’. Drag and drop the box shadow to the canvas and layer it backward to put it behind the phone mockup.
- For the other templates, click on the image/template and then choose edit < shadow < drop and change the settings accordingly.
You need to keep aligning the images and the phone frame to create the look you want. Just keep playing around and test different effects.
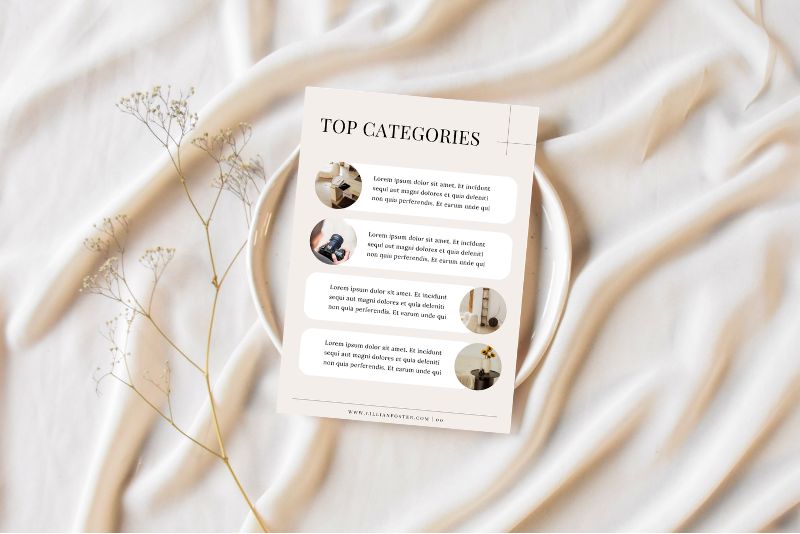
Let’s create another type of product image using shadows.
This is a great way to showcase multiple pages of a digital product. Let’s learn how to create this:
- Change the background to a desirable color.
- Drag and drop your template/copy of the digital product
- Go to edit < shadow < drop shadow. Play around with the settings.
- In the above image, I have kept the blurriness to 45 and the intensity to 30 to create this shadow effect. The other settings remain the same.
And that’s it! It only takes a few minutes to create this product image design.
Method 2: Smart Mockups
Canva offers a feature to create mockups of printable and digital versions of a product. Some examples are these:
These look so pretty, right? Lemme show you how to create them.
- Go to Elements and scroll down until you see the ‘mockups’ section.
- Click on ‘see all’ and scroll down to find smartphones, print and desktop mockups.
- Choose whichever mockup you like.
- Drag and drop your templates/themes on the frame and you’re done!
Look at this illustration:
This is a very simple way to create the ‘lifestyle product images’ which I have discussed earlier. You can incorporate real-life scenes into your products.
The only drawback is that they are very common because they are available for free use. If you want the quick and easy way, then this is it!
Method 3: Using Images
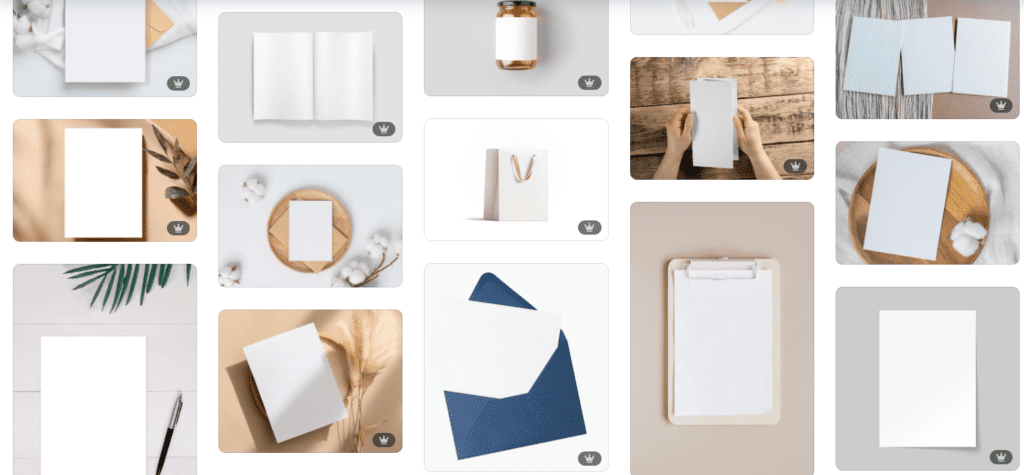
Another fantastic way is to use the Canva image gallery to create product images. Lemme show you some examples first.
See this image? I searched for ‘blank paper mockup‘ in Canva, dragged the image on Canva and adjusted my product/template right on top of the blank paper.
Canva has a huge photo library of these mockups. Some are free and some are paid. These are so handy and look so professional. I definitely recommend using this method to create some product images.
I created another beautiful product image using this method and it looks so attractive. Perfect for stopping the scroll for the viewers!

Additionally, you can add leaf shadows to add more ‘life’ to the product images. Keep experimenting and playing around with different features to create awesome images!
Method 4: Canva + Freepik mockups
Another foolproof way to create product mockups and product images is by using Freepik mockups and give them a final retouch in Canva.
Let me show you how I made this amazing magazine mockup:
- Go to Freepik and search for magazine mockup (or any other type of mockup you like)
- Filter the results by ‘mockups’
- Choose any mockup and click on edit
- This will open up an editor where you can import your digital products like templates or themes very easily
- Change the background to transparent and once the edit is done, download your product mockup
- Now open Canva and upload this product mockup in Canva
- Do final edits in Canva such as changing the background, adding texts and anything else you like
Voila!
Here’s an illustration of the mockup editor of Freepik:
Freepik offers a huge library of mockup templates. They are available for both free and paid plans.
Check out the magazine mockup library here.
Check out the device mockup library here.
This is super simple to do, trust me! And it’s not always necessary to use a plain background. You can use gradient, textured, or any other type of background you like.

It all depends on your product type and style.
Bonus tips to make your Product Images even more attractive
Now that you have learned how to create product images in Canva, let me tell you some extra tips to make them even more attractive and beautiful.
Prioritize the Product
Make sure the most important element (AKA your product) stands out first. Avoid too much cluttering.
While creating my product images, I always keep in mind to not add too many elements. Keep it minimal and straightforward.
The viewer’s eyes should focus straight on your product!
Stick to a branding
Trying different colors and themes for the product images is understandable but what I recommend doing is sticking to a common theme aesthetic and branding.
It also helps your customers to remember your brand/shop/products. Let’s say someone purchased a product from your shop. If they want to purchase something again, they may recognize your products with one look.
So, be consistent with the design and theme.
Highlight Key Features
You cannot write whole paragraphs in the product images to describe your product so use bullet points, headings, arrows, icons, and callouts to give attention to specific details.
You only have to create a limited number of product images (discussed below) so you have to help customers quickly understand the value.
Use a minimum of 10 Product Images
And I’m talking about a single product here. For my products, I create 10 product images per product.
10 images is a perfect number. Not too less and not a lot. If you have a smaller product then you can create 5 product images.
Make sure to include everything in those 10 images. You can take a look at my product images in my shop for better understanding.
Don’t ignore the quality
HIGH-QUALITY PRODUCT IMAGES. That’s very important to keep in mind. Of course, if you invest in some premium tools, then the quality of the products also goes high.
Avoid overly generic or outdated mockups. Show multiple variations or use cases in one image (e.g., different color options, multiple template pages).
Customers love seeing EXACTLY what’s inside.
Incorporate a Lifestyle Element
Give your products a more lively look. I absolutely love using leaf shadows, plants, coffee cups, etc. in my product images.
This works especially well for planners, templates, or work-related products. Adding these elements makes it feel relatable and aspirational.
So, what do you think?
You totally got this! I was once a beginner too but after a lot of practicing and experimenting, I’ve learned how to create some awesome product images. You can do it too!
If you have any questions related to Canva (or any other tool) to create product images, then let me know. I’m happy to help wherever I can!
See you around!